Installation
Note: As of July 22, 2022, the branding for the campus VPN client has changed from Pulse Secure (9.1rx) to Ivanti Secure Access (22.2Rx). All other aspects of the client are the same. Any reference to Pulse Secure should be interpreted as Ivanti Secure Access.
You will need Administrator level access on your Windows account in order to install this software.
Step 1: Download the Ivanti Secure Access VPN client package for Windows (UCSB Box credentials are required to access the file).
Step 2: Double-click the installer package to open it.
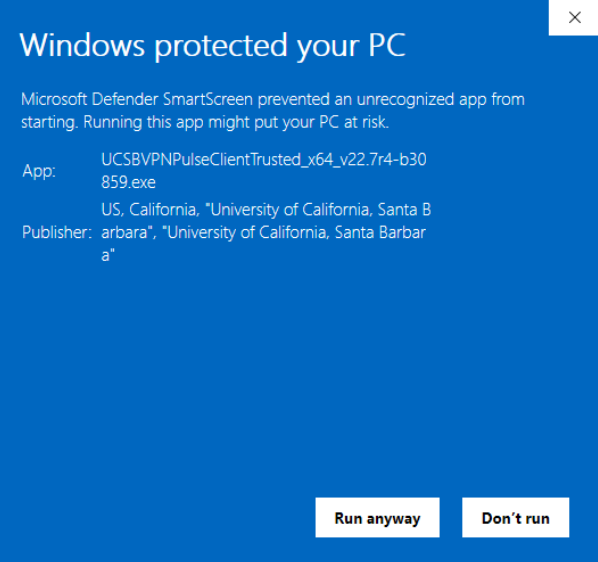
Note: You may receive a Windows Smart Screen warning message "Windows protected your PC." In this window, click "More info" to view the publisher certificate. As long as the window has similar data as the screenshot below, listing the Verified publisher with the following data: US, 93106, CA, Santa Barbara, 5221 Cheadle Hall, "University of California, Santa Barbara", you may click "Run anyway" to continue.
Step 3: Click Next

Step 4: Click Install

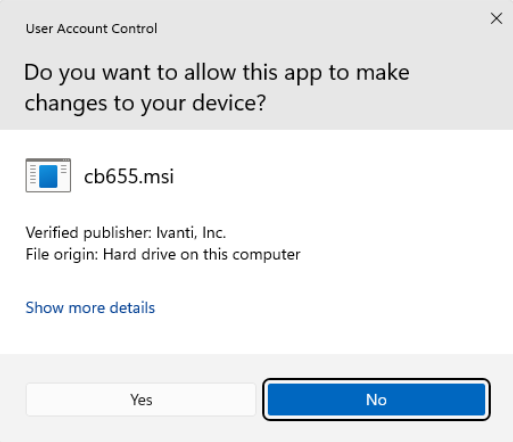
Step 5: Confirm the User Account Control prompt (enter the username/password of an administrator) to install the software. This is safe as long as the Verified publisher listed in the window is: Ivanti, Inc.
Step 6: Click 'Finish' once setup is complete.

Step 7: If prompted, install 'Microsoft Edge WebView2 Runtime' by clicking 'Install'.

Usage
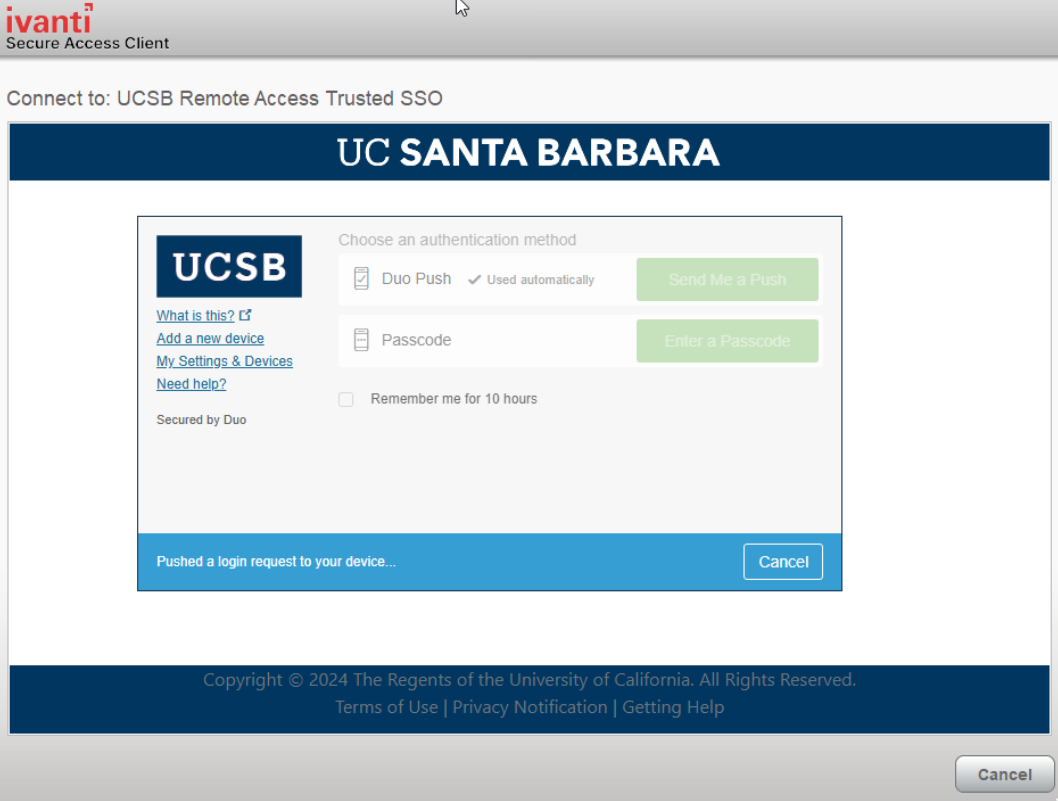
IMPORTANT: you must first have at least one device already enrolled with UCSB's MFA service (Duo Security) in order to connect to VPN.
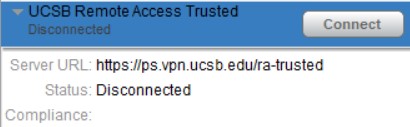
Step 1: Open the Ivanti Secure Access application from the Start menu. In the Ivanti Secure Access client window, click the Connect button inside the "UCSB Remote Access Trust" connection profile to initiate a connection to the VPN.
Note: If you are prompted to install the CEF browser, please visit our FAQ under the heading "When I try to sign in to the VPN using the Ivanti Client, I don't get the SSO login page - Install a Chromium Embedded Browser (CEF)."
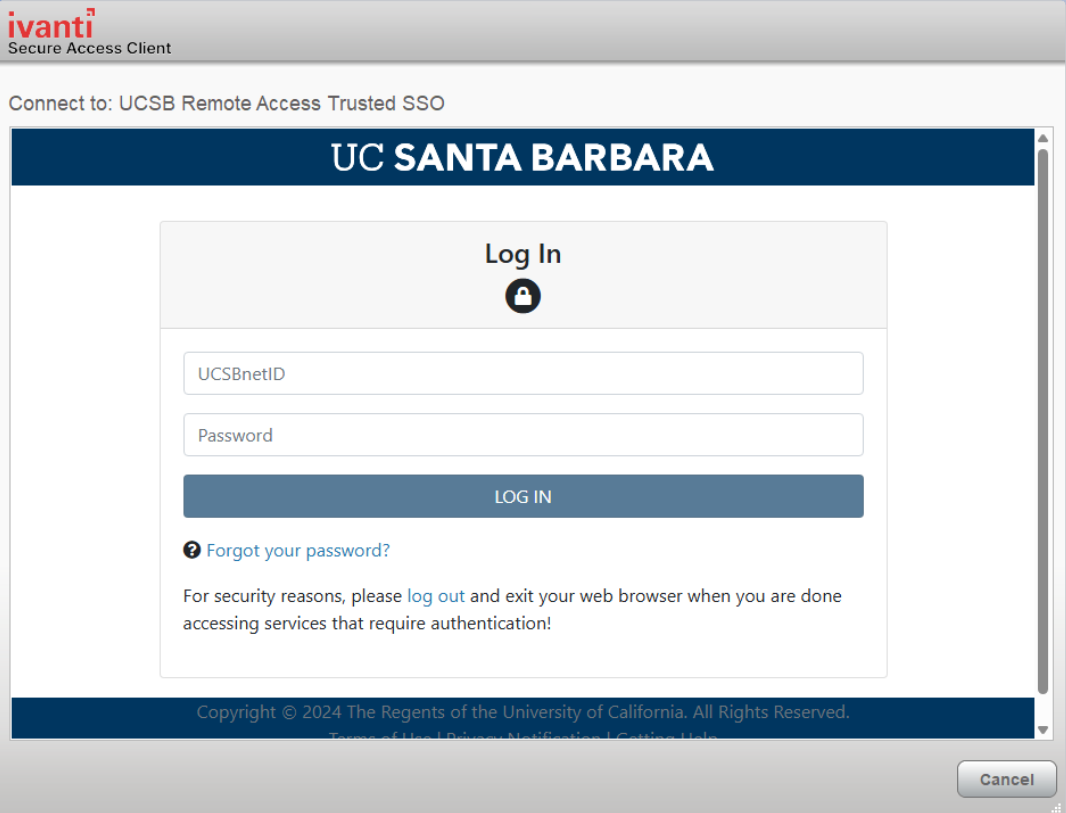
Step 2: The Ivanti client will bring up the SSO page for UCSB. Provide your UCSB NetID and password and click "LOG IN".
NOTE: The UCSB SSO login page will time out after a few minutes.
Step 3: Once your UCSB NetID credentials have been authenticated, you will be prompted to enter your multi-factor authentication (MFA).
Step 4: After MFA successfully complete, the client will connect and the button should change to read "Disconnect." Clicking the arrow on the left will expand the status area - this will show the words "Status: Connected."

If you receive an error like the one below, about the server certificate being invalid, close the Ivanti Secure Access VPN client. Open up the Edge browser and navigate to https://ps.vpn.ucsb.edu/install
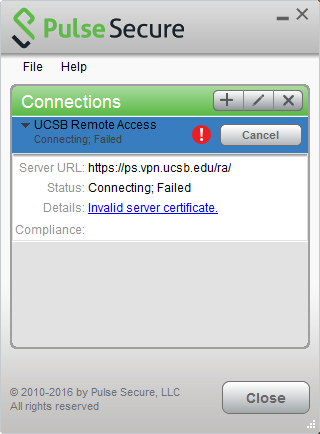
You should see a "green padlock" in the URL bar to show the certificate trusted. If you do not see the green padlock icon, download the Root CA and Intermediate CA from the linked page and install in Windows Certificate Store. Then try Step 3 again.
Step 5: Verify your VPN connection by using a web browser to visit https://next.noc.ucsb.edu/ip. The web page will display the network address your computer is using. If the VPN is in use, it should say “On-campus address (VPN).”
Step 6: To disconnect from the campus VPN service, click the "Disconnect" button.